Pergola Hardware Kits: Find Your Right Fit
Affiliate disclosure: Some links on this page are affiliate links. If you buy through them we earn a small commission at no extra cost to you. Recommendations are research-driven; we don't claim personal use of every product reviewed. Product prices and availability are accurate as of the date published and are subject to change. Always check Amazon for current pricing before purchasing. Learn more.
Quick Picks

Yardistry 10' x 12' Cedar Wood Pergola Gazebo Kit
North American cedar is naturally rot-resistant without chemical treatment
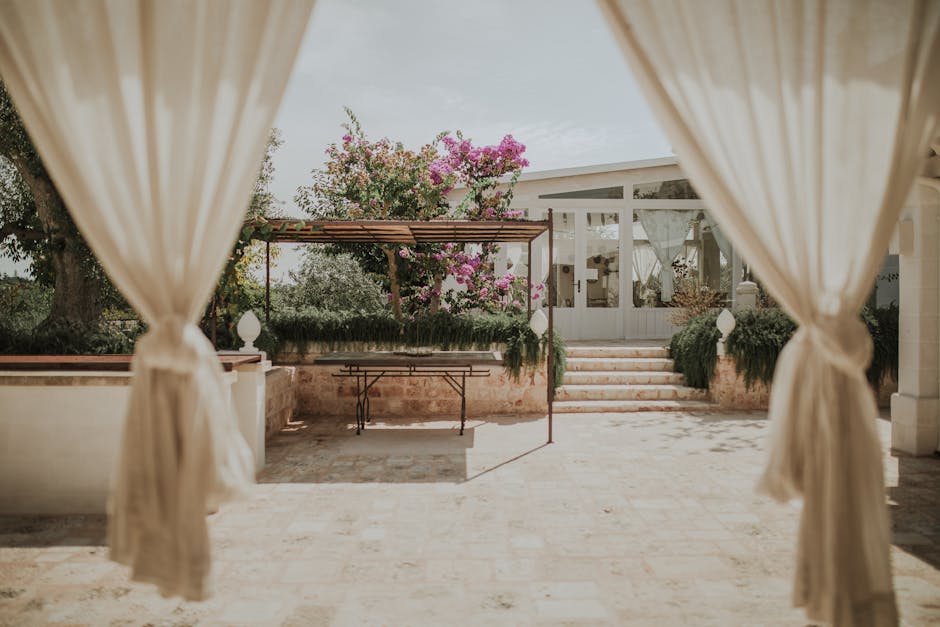
Buy on AmazonPergola hardware kits sit in an interesting middle ground: more permanent than a shade sail, less committed than a full outbuilding, and available at price points ranging from genuinely affordable to “I need to think about this.” If you’ve spent any time browsing the structural options covered in our Greenhouses, Sheds & Gazebos section, you’ve probably noticed that pergolas come up repeatedly as the entry point for serious outdoor structure projects. That’s because they’re one of the few additions you can plan on a Saturday, order by Monday, and actually have standing in your yard before the month is out.
This article is about how to choose pergola hardware kits, what to look for, and why one product in particular earns a clear recommendation.
What Pergola Hardware Kits Actually Are
A pergola hardware kit is a pre-engineered package that provides either the structural connectors and fasteners needed to build a pergola from lumber, or a complete cut-and-drill kit where the lumber itself is included. The distinction matters more than most buyers realize before they start shopping.
Connector-only kits give you the brackets and hardware. You source the lumber yourself, cut to dimension, and assemble. These run from entry-level to mid-range and can produce excellent results if you’re comfortable with a miter saw and know your post spacing.
Complete kits include pre-cut, often pre-drilled lumber alongside the hardware. They cost significantly more to premium,200 depending on size and material, but the time differential is real. If you’ve ever tried to cut a clean 60-degree rafter tail at 7 a.m. before company arrives, you understand why pre-cut matters.
Materials split into three main camps. Aluminum and vinyl kits are low-maintenance and weather-resistant, but they carry that look. Cedar and redwood kits have the warmth and weight that most homeowners actually want in a garden structure. Pressure-treated pine sits in the middle: cheaper upfront, heavier, and chemically treated in ways that some people prefer to avoid near food gardens or children’s play areas.
Why the Hardware and Material Choice Matters Long-Term
A pergola isn’t a seasonal purchase. You’re installing something that will move through freeze-thaw cycles, take summer UV exposure, and sit through whatever wet springs throw at it. Hardware that rusts, or lumber that wasn’t properly dried before milling, will telegraph those failures within two or three seasons.
The bracket quality deserves specific attention. Galvanized steel brackets can corrode at cut edges where the zinc coating was broken during manufacturing. Stainless or powder-coated hardware holds up better, particularly in humid climates. Check the fastener spec before you buy, not after.
Wood selection matters beyond aesthetics. Pressure-treated pine, while cost-effective, uses chemical preservatives (typically copper-based compounds in modern formulations) that can react with certain metals over time. Cedar doesn’t require treatment because it’s naturally rot-resistant. That’s not marketing language; it’s the actual reason cedar has been used in outdoor furniture and structures for a long time.
For properties with significant wind exposure, the post connection hardware and footing method are your critical points. A pergola that’s surface-mounted to a deck with undersized post bases is a different structural proposition than one set in concrete footings. If wind loading is a primary concern, the coverage in our best gazebo for high winds piece addresses that in more depth, though the engineering principles carry over to pergola post selection.
The Product Worth Your Money: Yardistry 10’ x 12’ Cedar Wood Pergola Kit
The Yardistry 10’ x 12’ Cedar Wood Pergola Kit is the clearest recommendation I can make in the complete-kit category. It, though pricing has fluctuated. Budget for the premium price as a working assumption.
What you get: North American cedar lumber that arrives pre-cut, pre-drilled, and pre-stained, plus the hardware to assemble a 10-foot by 12-foot freestanding pergola. The pre-stained finish isn’t decorative theater. It’s a functional first coat that buys you time before you need to apply your own topcoat, and it means the end-grain cuts were made before staining, which is the right order to do things.
Assembly time for two adults with basic tool literacy runs four to six hours. (I know people who’ve claimed two hours. I don’t believe them.) The pre-drilling is the actual time-saver here. Aligning brackets and driving screws into pre-drilled holes is a different experience from marking and drilling your own, especially once you’re up a ladder working on rafter connections.
The cedar quality is consistent with what Yardistry has delivered across their product line. Knots are present, as they are in any natural wood product, but they’re tight and stable. The lumber arrives dry enough that you’re not watching it crack and check through its first summer.
The honest trade-offs. Cedar requires restaining every two to three years. That’s not a flaw specific to this kit; it’s the maintenance reality of any natural wood outdoor structure. If you want something you can install and forget for a decade, vinyl or powder-coated aluminum is your category. Cedar is the choice when you want something that looks like it belongs in a garden rather than a hardware store.
The base kit provides shade through the open-rafter design, not rain coverage. Yardistry sells polycarbonate roof panels separately for the size that fits this kit. If your goal is a covered outdoor space you can use during rain, budget for those panels at the outset. They attach without modification to the existing frame and do a reasonable job of shedding water without making the space feel like a greenhouse. Worth adding. If year-round covered outdoor living is the primary goal, though, you might find the purpose-built options in our screened gazebo for deck coverage more appropriate.
How to Install Pergola Hardware Kits: The Actual Process
This is the part where instruction manuals often lie by omission.

Step 1: Footings first, always. Determine whether you’re anchoring to a concrete pad, existing deck, or setting posts in ground. For freestanding installations in soil, 24-inch minimum depth is standard in areas with significant frost. The Yardistry kit assumes post-to-bracket connections and doesn’t include footing hardware. Budget extra for post bases if you’re setting in concrete.
Step 2: Lay out your post positions before anything is cut or set. Use batter boards and string lines to establish your exact corners. The 10’ x 12’ dimension refers to the post spacing, not the overall footprint including rafter overhang. Measure twice, set footings once.
Step 3: Get the posts plumb before you torque anything down. This sounds obvious. It gets skipped. Have a second person hold each post with a level on two faces while you secure the base bracket. Bracing temporarily with scrap 2x4 diagonals while the rest of the frame goes up is worth the ten minutes it takes.
Step 4: Beam installation is a two-person job. The doubled beams on a pergola this size are heavy and awkward. If you’re working alone, build a temporary support ledger on each post to rest the beam while you get into position. Trying to hold a beam overhead while also driving a fastener is how people get hurt.
Step 5: Rafters and top slats last. With the Yardistry kit, the rafter notches are pre-cut to sit over the beams. Check the spacing against the instructions before you start; the notch depth determines how much of the rafter sits below the beam line, which affects your finished ceiling height.
Step 6: Post-assembly, before staining. Fill any fastener recesses and sand the pre-drilled holes smooth. Then apply your topcoat of exterior wood stain. Doing this within the first season, before the cedar weathers to gray, keeps the maintenance cycle manageable.
Common Mistakes with Pergola Hardware Kits
Buying for current furniture, not eventual use. A 10’ x 12’ pergola fits a table and four chairs or a loveseat and two side chairs. It does not fit a full outdoor sectional plus a dining set. Measure your intended furniture arrangement with tape on the ground before you order.
Skipping the footing calculation for your soil type. Clay soil behaves differently than sandy loam under a post footing. In areas with heavy freeze-thaw movement, undersized footings heave. The post shifting even a quarter inch throws your beam level and makes every rafter connection slightly wrong.
Ordering the kit without the optional roof panels and then regretting it. The shipping cost on the polycarbonate panels ordered separately later almost always exceeds what you’d have saved by ordering together. If you think you might want them, add them to the original order.
Using interior wood screws as substitutes. Every screw in an exterior structure should be rated for exterior use, minimum. This is particularly true with cedar, which is mildly acidic and accelerates corrosion in standard steel fasteners. The Yardistry kit includes appropriate hardware. Any supplemental fasteners you add should match the spec.
Treating the stain schedule as optional. Cedar goes gray within a single season if left uncoated. Gray cedar isn’t structurally compromised, but it’s harder to reverse than to prevent. The maintenance interval on this material is real.
If you’re planning additional structures nearby and want to think through the full property picture, the range of options in our Greenhouses, Sheds & Gazebos hub is a reasonable place to spend an hour. A pergola often works better when it’s part of a coordinated layout rather than a standalone decision.
,
Frequently Asked Questions
How difficult is it to install a pergola kit without professional help?
For most complete kits including the Yardistry cedar kit, two adults with basic tool skills can manage the installation. You’ll need a drill, a level, a rubber mallet, and someone to hold components while the other fastens. The part that benefits most from experience is setting the footings correctly. If you’ve never done concrete footings before, watch a few tutorials specifically on post-base setting before you start.
Do pergola kits include everything needed for installation?
Complete kits like the Yardistry include lumber and primary hardware, but typically not footing hardware, concrete, or the post bases for ground mounting. Budget extra for those materials. Connector-only kits don’t include lumber at all, so factor in lumber costs and your time cutting to dimension.
How long does a cedar pergola last?
With proper maintenance, 20 to 25 years is reasonable. Cedar’s natural resistance to rot and insects gives it a real longevity advantage over pressure-treated pine in an exposed outdoor setting. The critical variable is keeping the stain coat intact. Bare cedar that stays wet through repeated cycles will eventually check and crack, which compromises the lumber faster than the species’s natural properties would suggest.
Can the Yardistry pergola kit be attached to a house?
The Yardistry 10’ x 12’ kit is designed as a freestanding structure. Attaching a pergola to a house wall changes the structural load path and typically requires a ledger board, flashing, and in most jurisdictions, a permit. Freestanding installation avoids that complexity. If you want a house-attached pergola, look specifically for kits designed for that configuration.
Do I need a permit to install a pergola?
This varies by municipality. Most jurisdictions require a permit for structures over a certain footprint, typically 200 square feet, or for any structure attached to a house. A freestanding 10’ x 12’ pergola falls under the threshold in many areas, but check with your local building department before you start. Some HOA covenants have separate rules that are stricter than local code.
Frequently Asked Questions
What is the difference between a connector-only pergola hardware kit and a complete kit?
Connector-only kits include just the brackets and fasteners — you source and cut the lumber yourself, which costs $80 to $200 but requires saw work. Complete kits like the Yardistry include pre-cut, pre-drilled lumber plus hardware for $900 to $1,200, saving significant time and reducing the chance of cutting errors.
What hardware is typically missing from budget pergola kits?
Budget kits often omit post bases, anchor bolts, and footing hardware required to actually secure the structure to the ground or a concrete pad. Budget an additional $40 to $80 for these items regardless of which kit you choose, and confirm the hardware inventory in the product listing before purchasing.
Can I use standard steel screws with a cedar pergola kit?
No — cedar is mildly acidic and accelerates corrosion in standard steel fasteners. Use hot-dipped galvanized, stainless steel, or coated screws rated for exterior use. Quality complete kits like the Yardistry include appropriate hardware; any supplemental fasteners you add should match that specification.
How do I know if my soil type requires deeper post footings for a pergola?
Clay soil expands and contracts more than sandy loam, and in freeze-thaw climates it will heave shallow footings. A minimum of 24 inches is standard, but in colder regions the frost line can be 36 to 48 inches deep, which is the depth your footings need to reach. Check your local building department for the frost depth requirement in your area.
Is a 10x12 pergola kit large enough for a standard outdoor dining set?
A 10x12 fits a four-person dining table with chairs or a loveseat plus two side chairs — but not both. The 10' by 12' dimension refers to post spacing, and rafter overhang adds a modest amount beyond that. Measure your intended furniture footprint on the ground with tape before ordering to confirm the size works.
Where to Buy
Yardistry 10' x 12' Cedar Wood Pergola Gazebo KitSee Yardistry 10' x 12' Cedar Wood Pergol… on Amazon